
AWS ECR Integration Settings
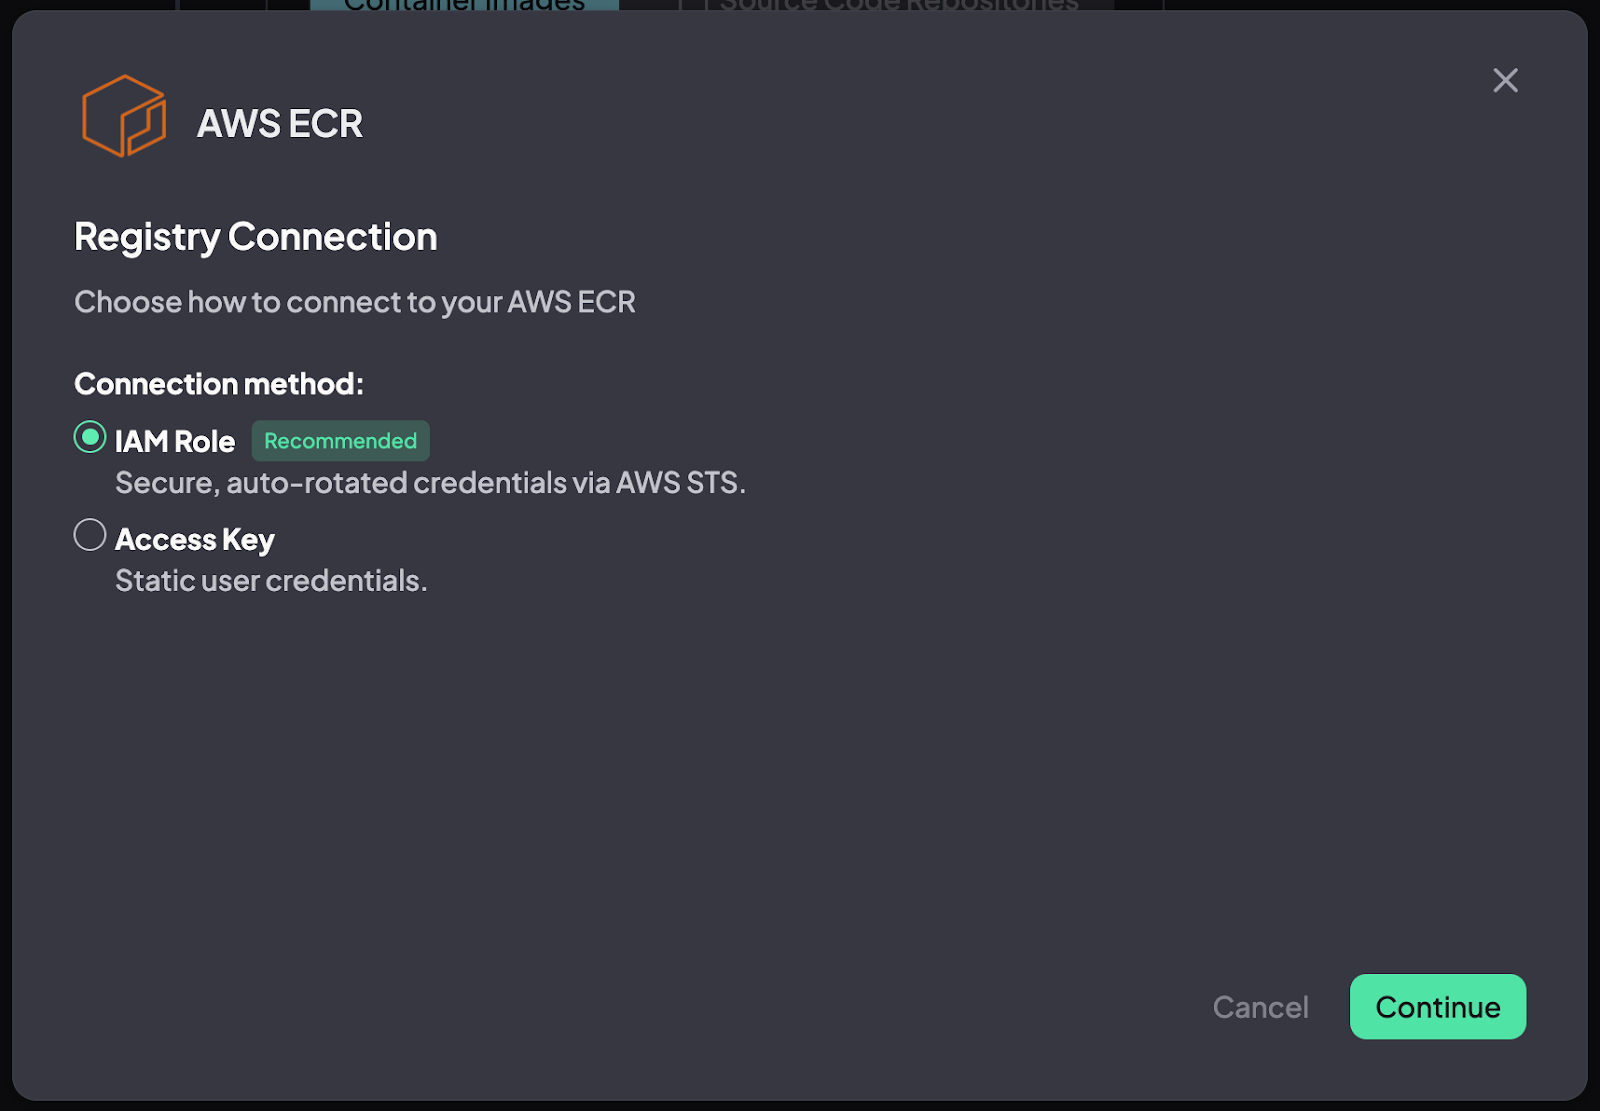
There are two options to connect your AWS ECR with the Hopper App:
- Create a New Role (Recommended)
- Create an Access key.
Option 1 - Create a New Role
To connect your ECR container registry to the Hopper App, you need to create a New Role in your AWS platform. This process involves three simple steps:
- Create a New Role in AWS
- Add permission to the ECR by creating a permission policy
- Update the Hopper App with the Role details
Create a New Role in AWS
1. After clicking on Connect in the Hopper App, open another tab for your AWS account.
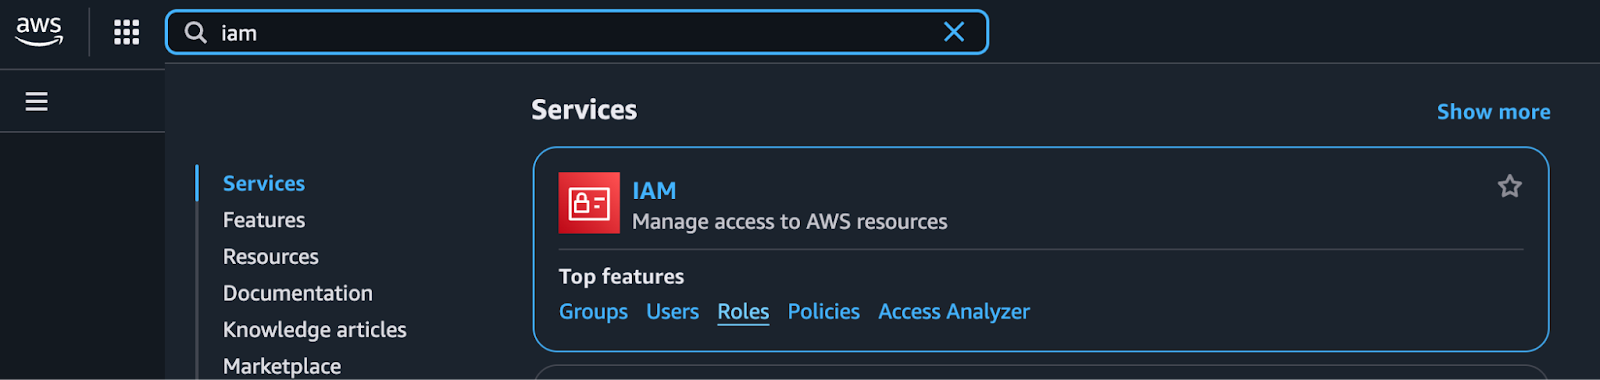
2. On the left side of the page, locate the search box. Type "IAM" (responsible for all the permissions) into the box, then click "Roles".
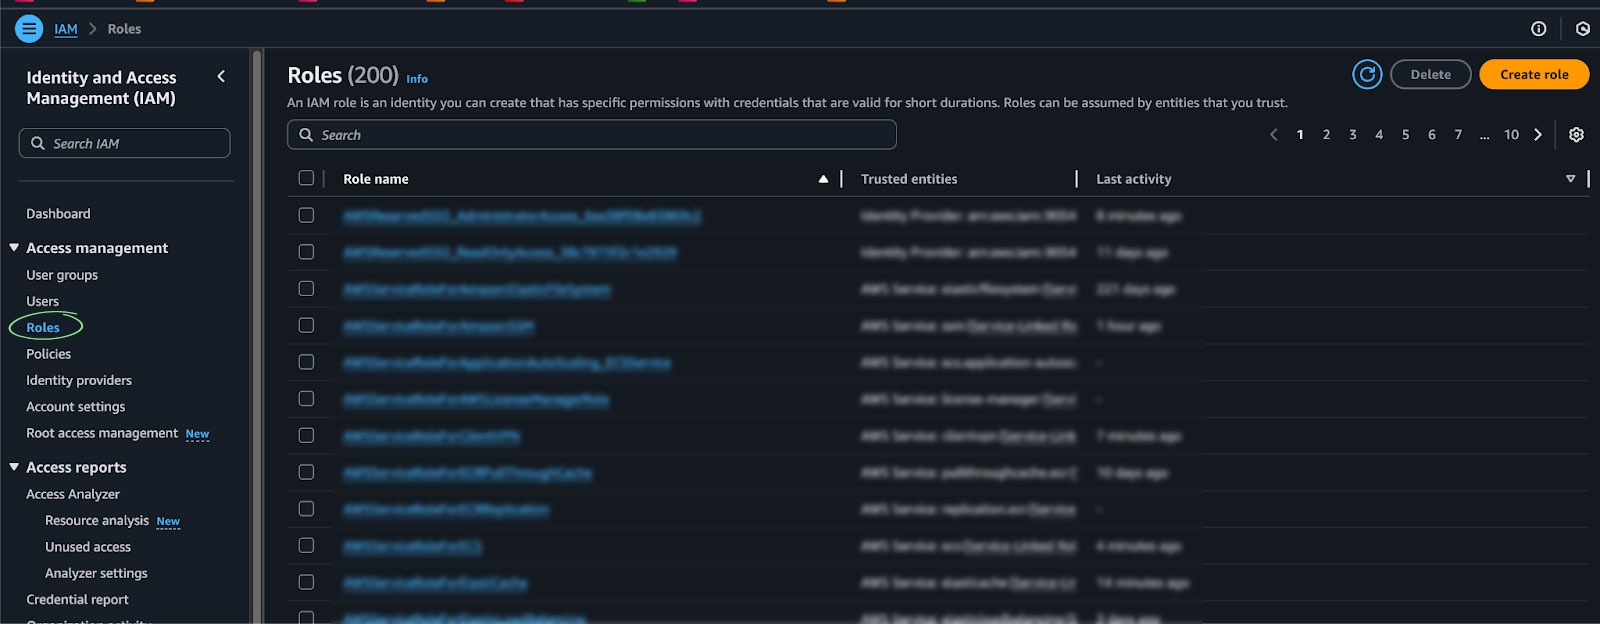
3. Click on the Create Role button (right side of the screen).
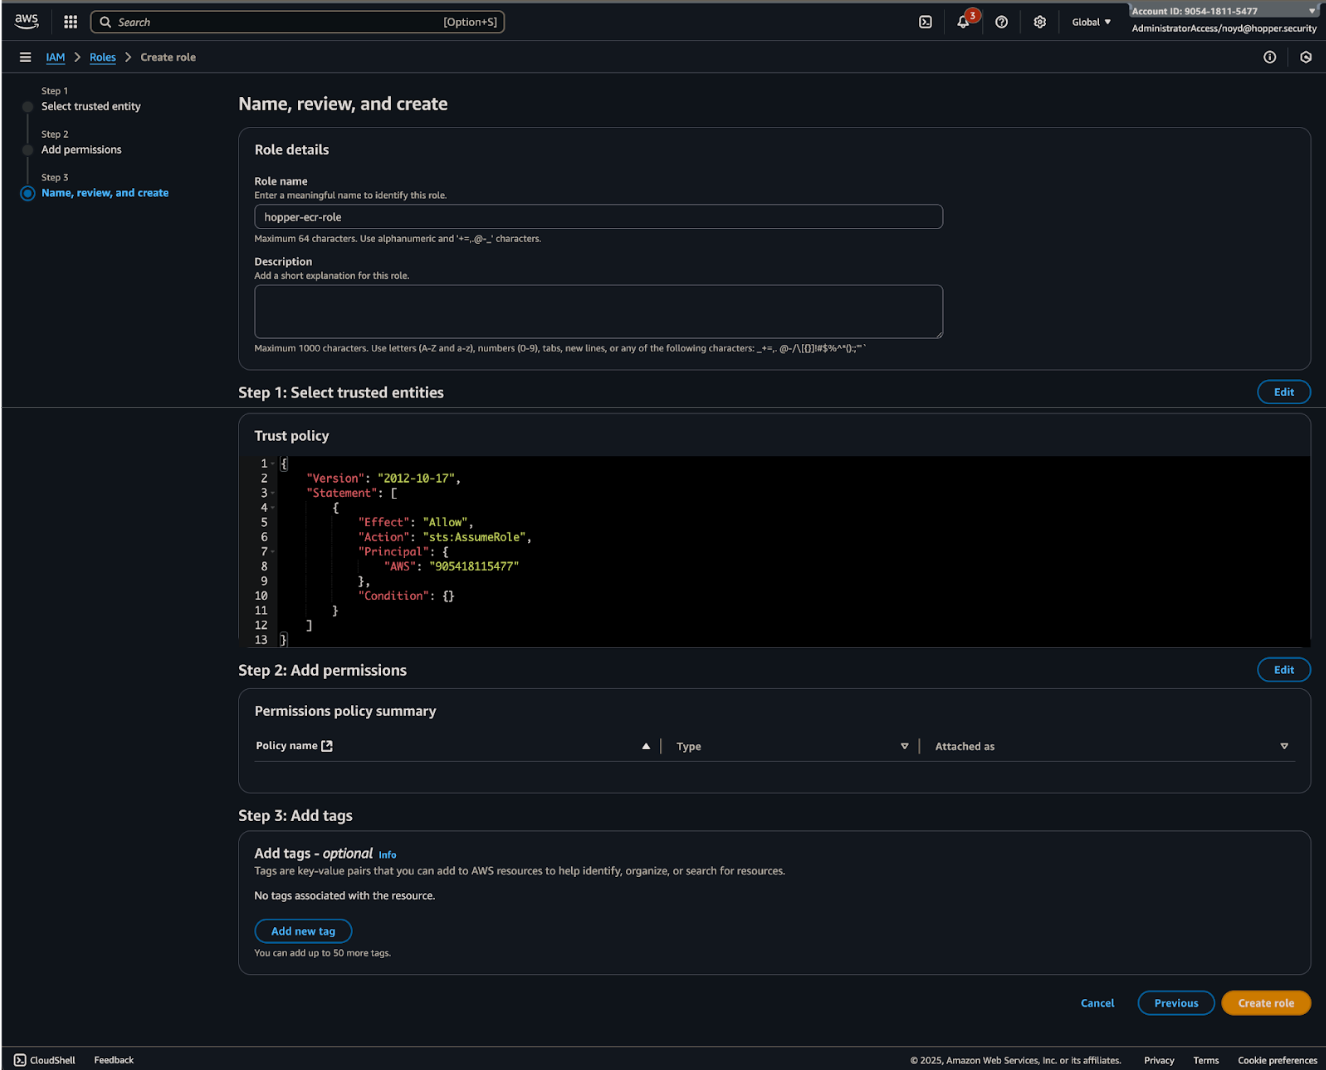
4. Under Trusted Entity Type, select AWS Account → under Account ID type the Hopper account number: 851725169785 and click next.
Please note: You can copy the number from the Hopper App.
Recommendation: By checking the Required External ID, you can define an ID that can be used only by Hopper. If you have created an External ID, please make sure to update it in the Hopper App as well.

5. “Add Permissions” - by clicking Next.
6. Name your new Role, scroll down and click on Create Role at the bottom.
7. You now have a new AWS Role, without permissions, that will enable Hopper to connect to your AWS ECR account.
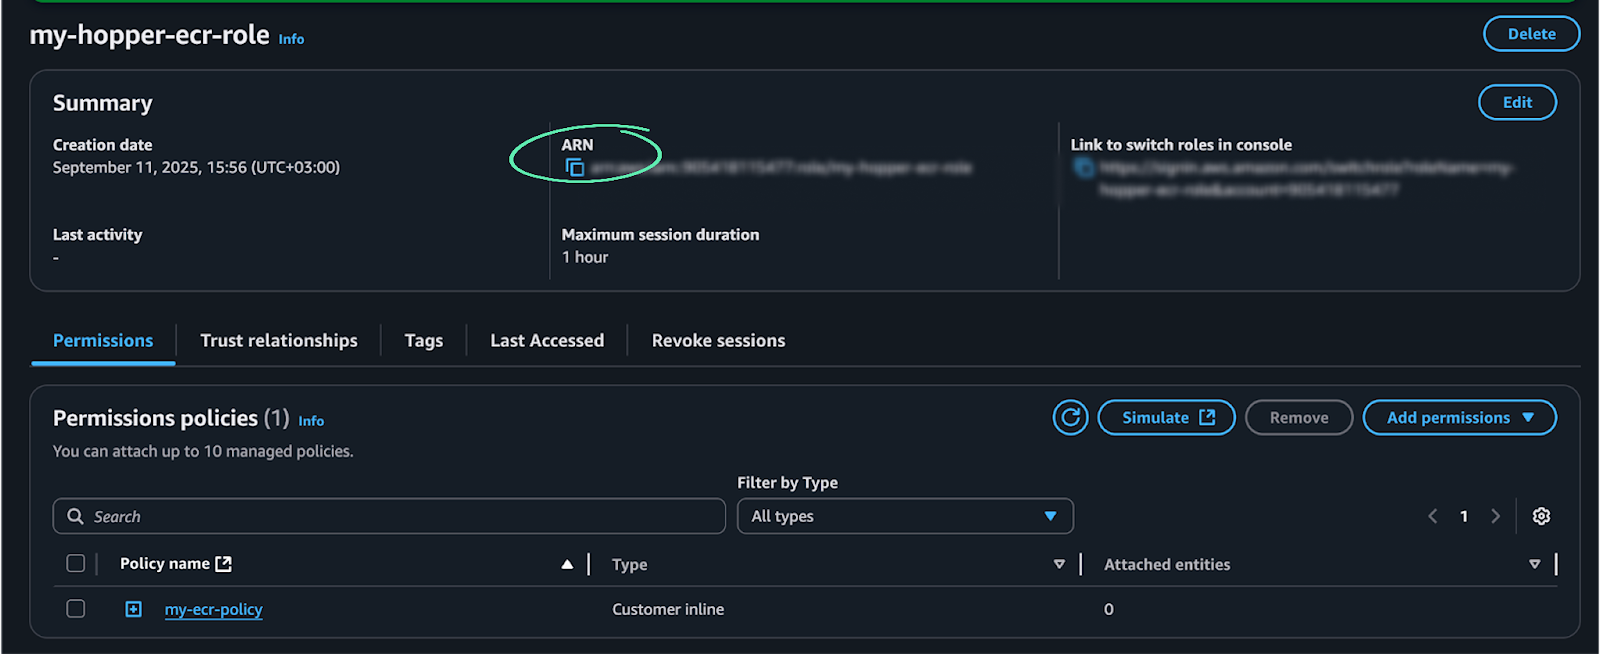
8. Return to the Roles page, locate the new AWS Role using the search box, and then select it.
Add Permissions
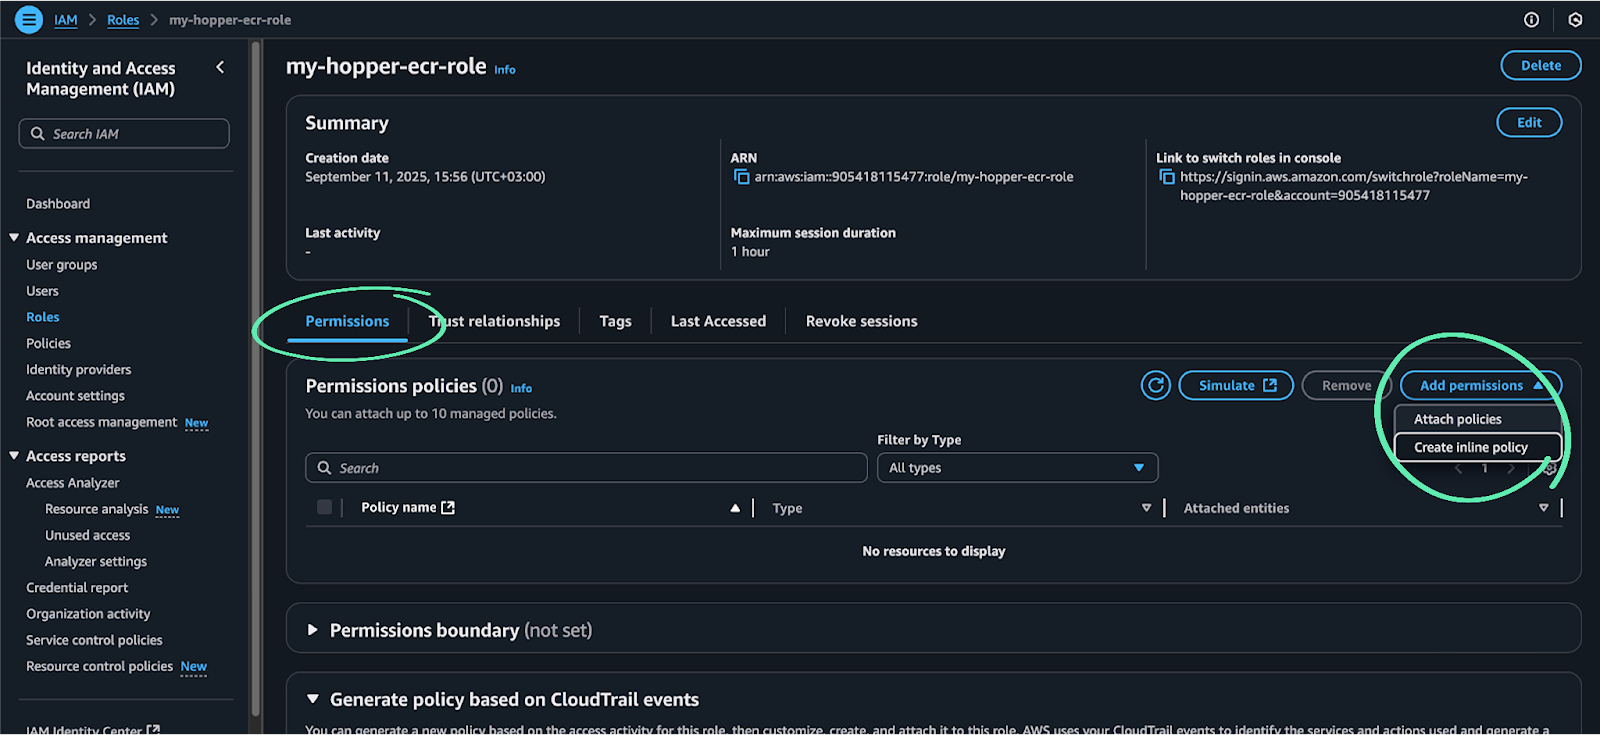
1. In the new role page, click on the Permissions tab → click add permissions -> select Create inline policy.
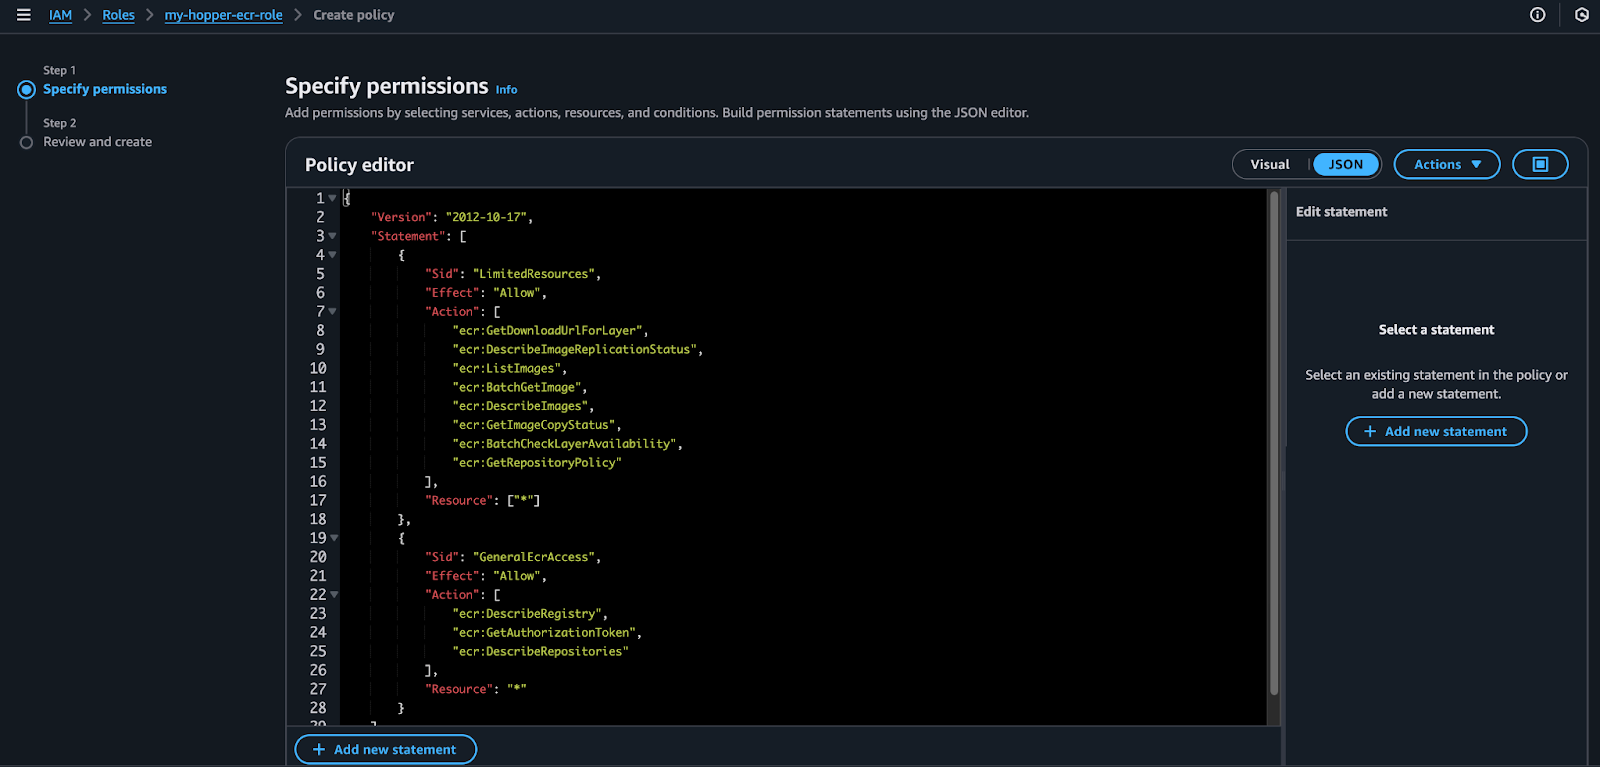
2. A policy creation window will appear. Click on the JSON tab located on the right side.

3. Delete the default code.
4. Copy and paste the following JSON configuration into the policy editor. Note that you can also find it in the Hopper app.
{
"Version": "2012-10-17",
"Statement": [
{
"Sid": "LimitedResources",
"Effect": "Allow",
"Action": [
"ecr:GetDownloadUrlForLayer",
"ecr:DescribeImageReplicationStatus",
"ecr:ListImages",
"ecr:BatchGetImage",
"ecr:DescribeImages",
"ecr:GetImageCopyStatus",
"ecr:BatchCheckLayerAvailability",
"ecr:GetRepositoryPolicy"
],
"Resource": ["*"]
},
{
"Sid": "GeneralEcrAccess",
"Effect": "Allow",
"Action": [
"ecr:DescribeRegistry",
"ecr:GetAuthorizationToken",
"ecr:DescribeRepositories"
],
"Resource": "*"
}
]
}
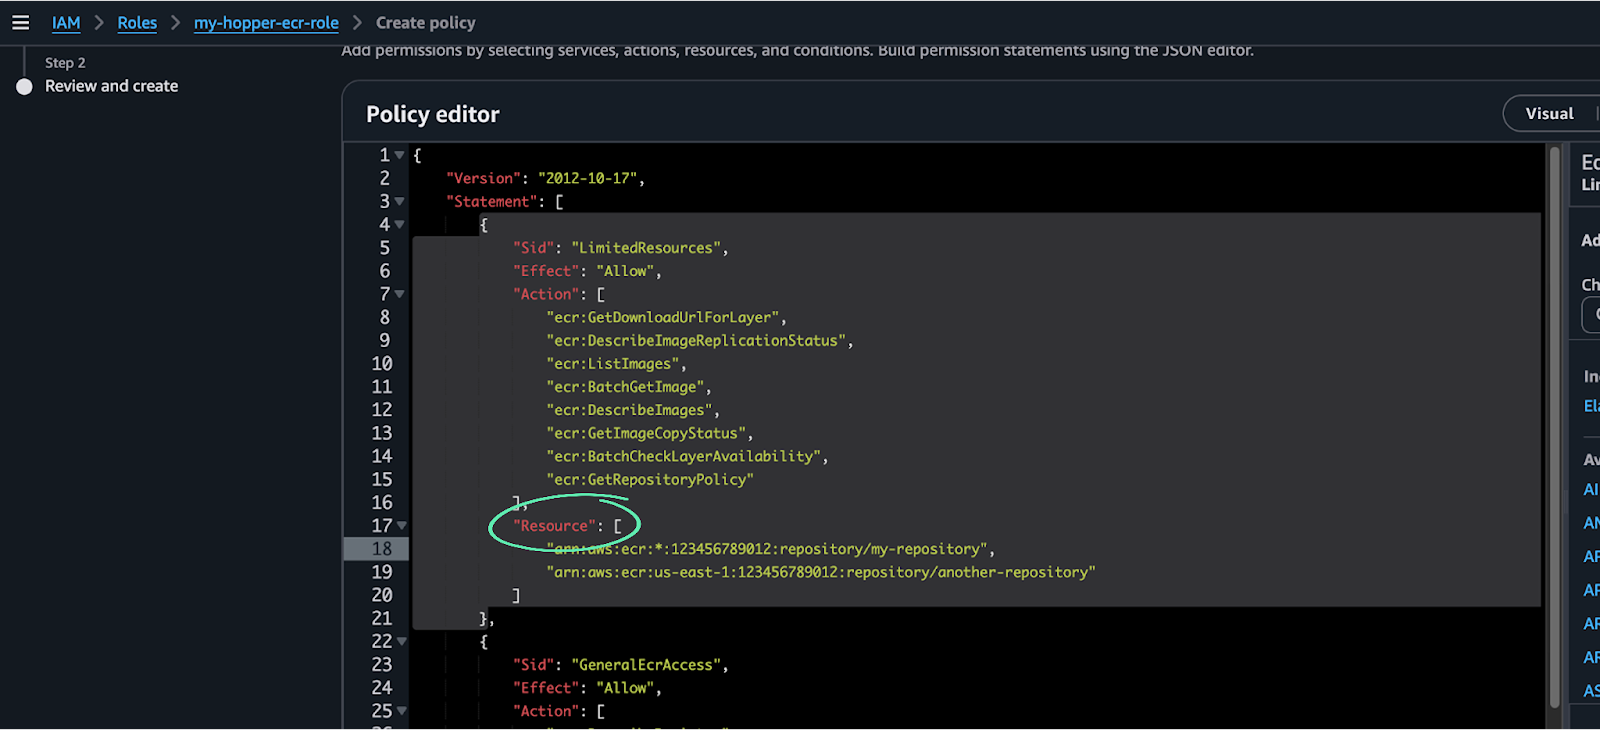
Optional - To limit the policy for access to a specific repository you need to edit the Resource section in the JSON
- Replace "*" in the Resource field with one or more ECR repository ARNs.
- ARN format: arn:aws:ecr:<region>:<account-id>:repository/<repository-name>.Wildcards (*) can be used in region, account ID, or repo name.
- Example:
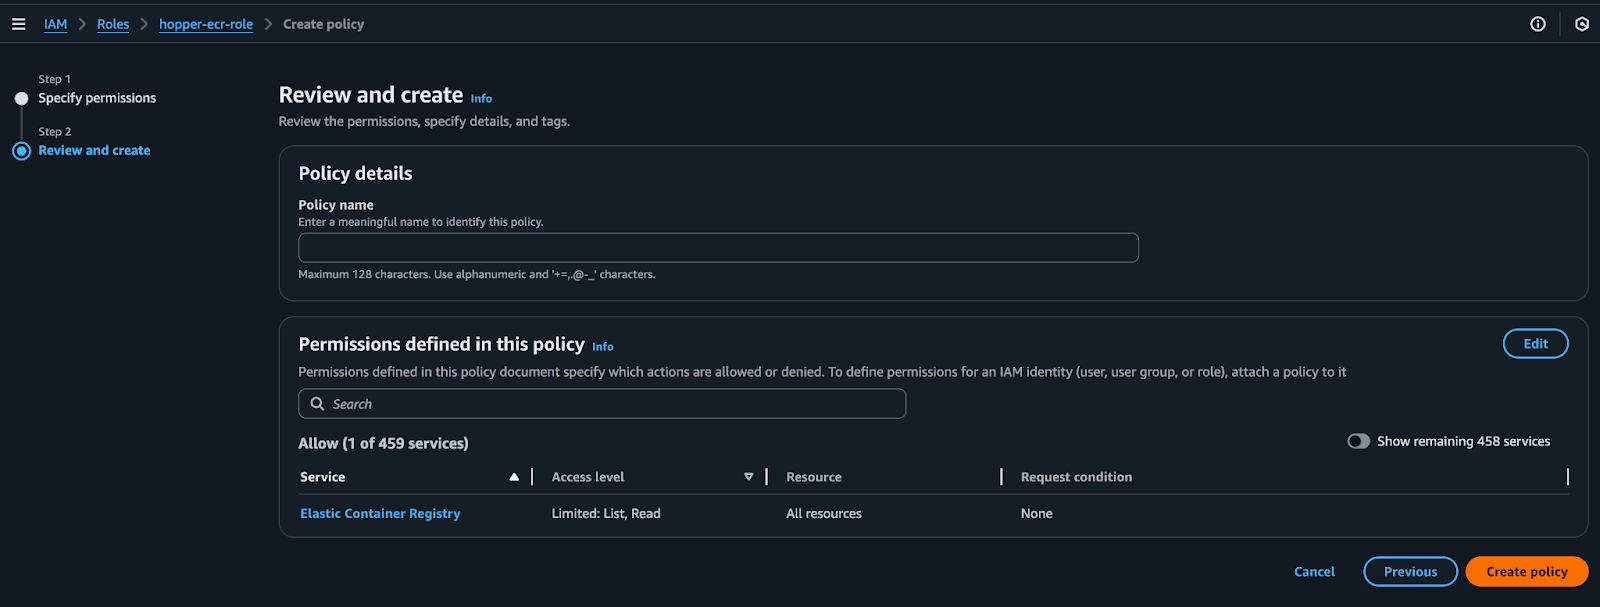
5. After defining the policy permissions, click Next → name the policy and select Create Policy at the bottom.
Connect the Role to the Hopper App
1. Copy the ARN number of the Role and paste it in to the Hopper App
2. Define the Region
Please note: You may have multiple Regions. If so, please ensure you add each Region to the Hopper App and use the same ARN of the Role.
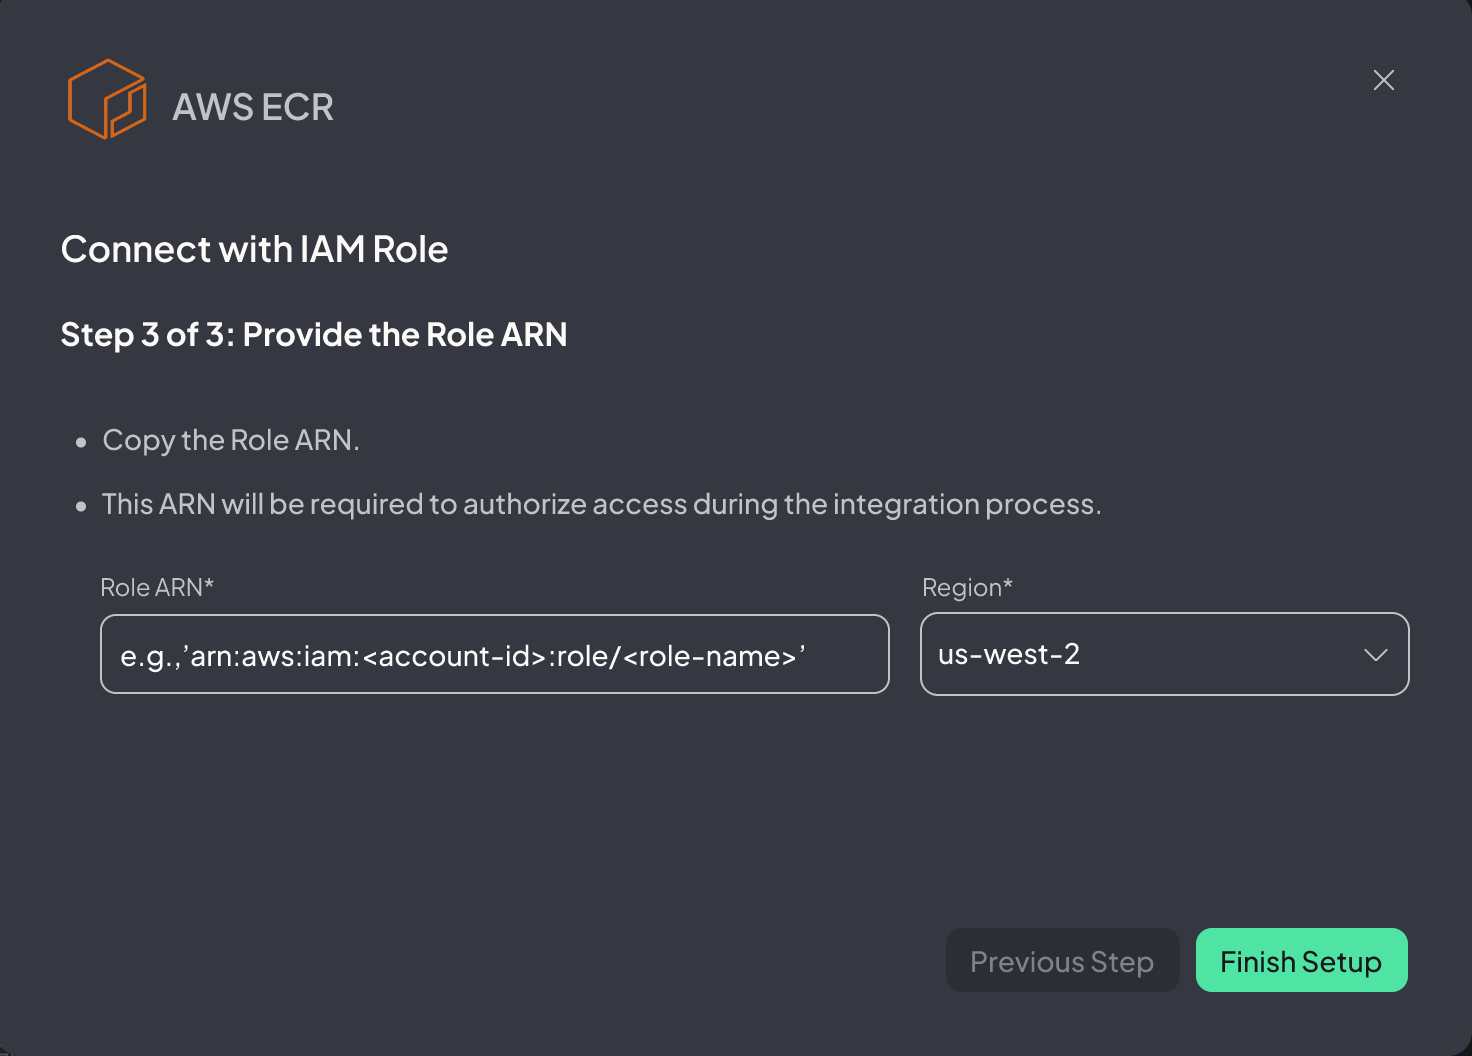
3. Click Finish Setup, and you are set!
All set? Proceed to:
Select Repositories and Images